How to Convert Table Links to Buttons
I consider this an ADVANCED HTML and CSS Tutorial
But it won't hurt anything to try
You'll need to do this in a text editor - NotePad will work but it doesn't allow you to "tidy up".
FIRST make a backup copy of your page and put it somewhere safe.
You'll need to COPY just the table rows and cells. If this is a fairly big table, it MIGHT be easier to copy the whole page and remove the top and bottom instead.
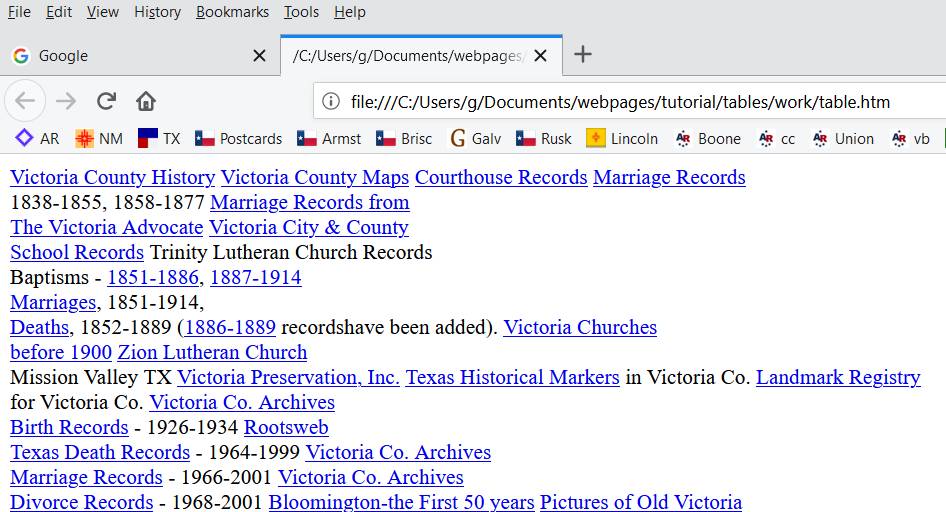
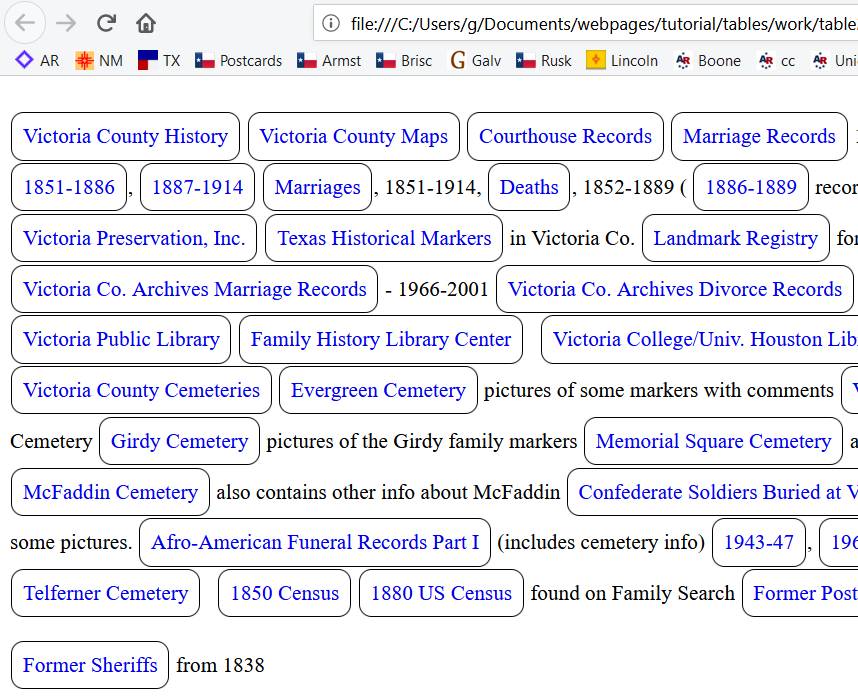
This is the page I'm using as an
example.
This only LOOKS complicated, I put each step on a separate line and there's a lot of explanation for folks not as familiar with HTML or CSS so there isn't as much to it as it seems.
This also works great on other existing MENUS.
Step 2.
Steps 4 and 9.
Step 13.
 |
PREPARATION:
If your links look like those in my example page (with a lot of unlinked text, line breaks and images), this WON'T WORK easily. You need to edit your links and remove images using your TEXT or HTML EDITOR before you start. If all your links name your county (i.e. Victoria County Schools), remove that, you don't need your county name on every link. Whether you're familiar with HTML and CSS or not, the easiest way to prepare is to open the page with the table you want to convert in your HTML EDITOR and highlight and copy JUST the TABLE(s) to a new blank page. The only problem I've run into with this method is that the HTML EDITOR changed all my relative links to local addresses but that's easy to fix with **REPLACE. Edit your links so that they are a manageable length and edit your table to remove images or text that isn't going to be inside a link.
- SAVE this new page (something like table.htm). This is a WORK file and I usually have a WORK folder in each website - files I don't upload.
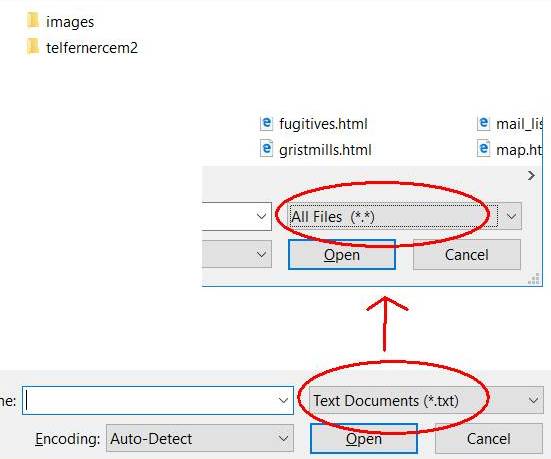
- Open this new page in NotePad. You'll need to change Text Documents to All Files (see screenshot).
- In NotePad, CLICK Edit, CLICK Find.
- TYPE in <table
- CLICK Find Next.
- DELETE the whole <table> tag including the brackets. In my page, it would be two rows:
<table border="3" cellpadding="10" width="80%"
bordercolor="#00008B">
- DELETE everything else above the row(s) you just deleted.
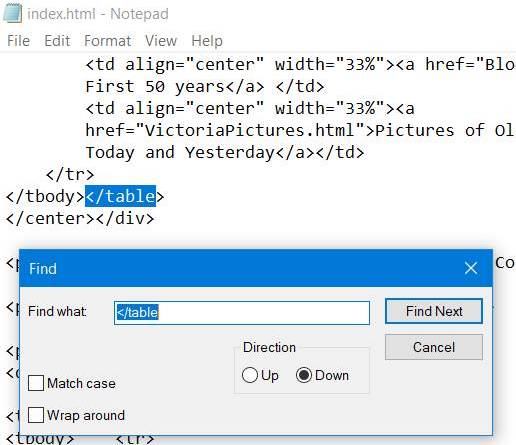
- CLICK Edit, CLICK Find
- TYPE in </table
- DELETE everything from </table> down. (In my example, I had multiple LINK TABLEs. I deleted ALL the <table> tags and other stuff between the tables and worked on all the buttons at one time.) Remember, you're only working on your table(s) for now so the other stuff isn't important.
- If you have <tbody></tbody> tags, delete those, too.
You should only have table rows <tr> and table cells <td> remaining of the table structure.
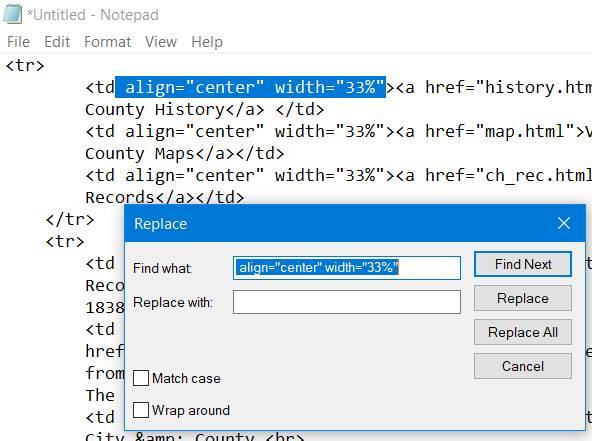
- If your rows and cells have FORMATTING, you'll want to remove it.
The easiest way is to FIND and REPLACE with nothing. DON'T TYPE ANYTHING in the Replace with box - not even a blank space.
- SELECT (highlight) the formatting, including the space in front of it.
- CLICK Edit, CLICK Replace. Be sure the second box is empty.
- CLICK Replace All.
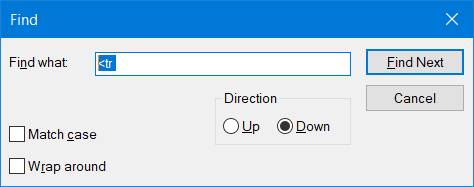
- You can check for more formatting by finding <tr or <td (with a blank space after each).
 |
Steps 2 and 3.
Step 4.
 |
CONVERTING:
- Since folks tend to put blank spaces in empty cells, use FIND to see if there are any .
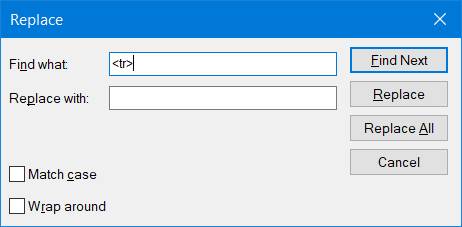
- DELETE (replace with nothing) any <td> </td>
- REPLACE all the <tr> with nothing. Do the same for the </tr>, <td> and </td>.
SEEING WHAT YOU'RE DOING:
- COPY and PASTE this simple heading to the very top of your work page.
<!DOCTYPE html>
<html lang="en">
<head>
<meta http-equiv="Content-Type" content="text/html; charset=UTF-8">
<meta name="viewport" content="width=device-width, initial-scale=1">
</head>
<body>
<br>
- And put this at the very bottom.
</body>
</html>
- OPEN this work file in your browser.
Open the browser, CLICK File, CLICK Open. (or find it in File Explorer and double-click it)
- You can REFRESH the browser each time you make a change until you have what you want.
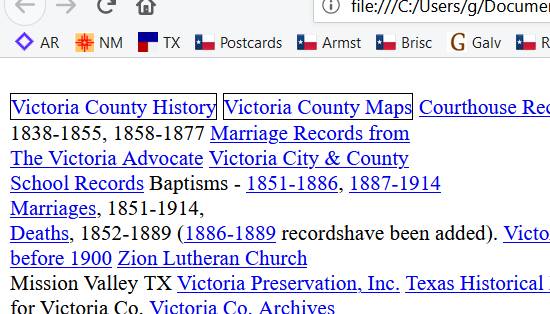
For now you have just a paragraph containing all the links that were in your table.
We want to make that paragraph look like buttons. (All that black text and line breaks <br> mixed in with those links is going to cause me extra work.)
|
FORMATTING:
- For now, we're going to work on two buttons until we know what we want.
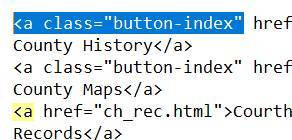
- FIND the first link (<a href="somelink.htm">) in your list.
- ADD a class <a class="button-index" href="whateverthisis.htm"> (You can name it anything, I'm using this because I may add more buttons later.)
- FIND the SECOND <a tag and add the class to it too.
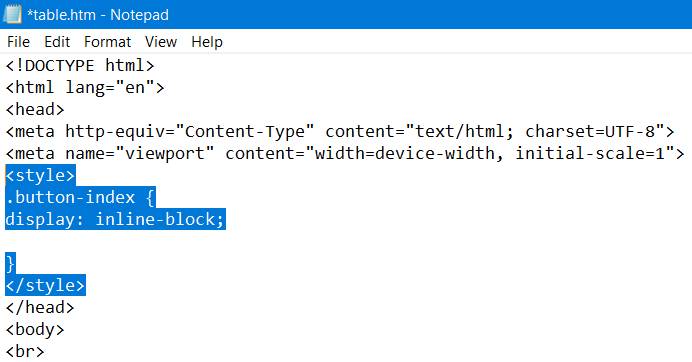
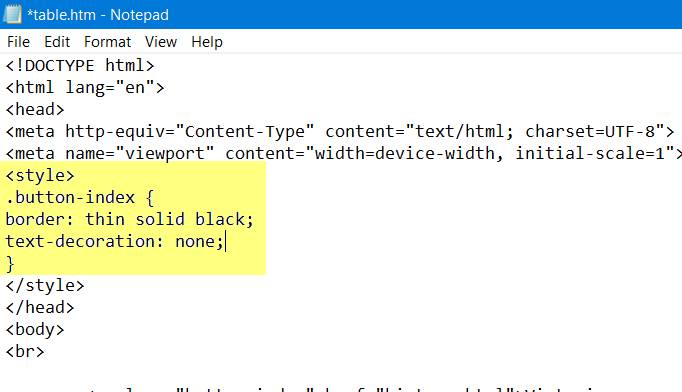
- Near the top of your page, just above </head>, TYPE (or copy and paste) this needs to be the same class name you added to your links.
<style>
.button-index {
display: inline-block;
}
</style>
This is your style sheet. Links MUST be changed to blocks so that you can adjust the height and width if necessary.
- Go back to your style sheet and add a line for a border.
border: thin solid black;
- SAVE, REFRESH your browser.
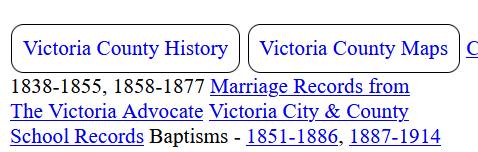
Aha! Buttons.
- We don't need the underlines any more so add this line to your style sheet
text-decoration: none;
- A MARGIN is space that you can add to the OUTSIDE of something. We want to add just a little.
margin: 1px;
- But we need to add some PADDING to the INSIDE of our button
padding: .5em;
Margin and padding are added the same way, a single value like above adds that to all four sides. If you want different values for each of the sides, the correct order is clockwise,
top, right, bottom, left.
padding: 1px 1em 2px .5em;
- I like my buttons with rounded corners
border-radius: 10px;
 |
Step 5.
Step 8.
Step 10.
|
FINISHING:
These buttons are almost exactly what I want and I don't think I've made any mistakes so I'm going to copy the class to the rest of the links.
- SELECT your first link and class and COPY them.
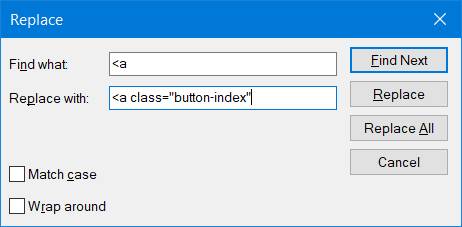
- SELECT the <a in your THIRD link.
- CLICK Edit, CLICK Replace.
- PASTE your copied text into the Replace with box.
- CLICK Replace all.
- In NotePad, you'll need to remove the duplicated class from your first two links.
In my particular case, I now have a mess because there were a LOT of line breaks and extra text in my table. I'll have to take all that extra text out of there. If it isn't part of the link, it has to go. If it's something important, I move it to the inside of the link. You can view the whole result - an example of what NOT to DO.
- CLEAN UP any links.
- Now you can tweak your buttons all you want. I like mine to be more or less uniform.
text-align: center;
min-width: 10em;
- After I decide on a minimum width, I pull the longer buttons out and move them to the bottom if I can't make the links shorter. (Cut and Paste) Decorate your buttons in any way you like.
- You can add a background color
background-color: #eee;
- Add a drop shadow (if you use this, you'll want a bigger margin around the buttons)
box-shadow: 2px 2px 5px #999;
I've removed a lot of text, some duplicate links, some anchored links (links that point to a specific place on a page that is already linked) and most line breaks. For the very long buttons, I added some line breaks and I added a line break between the last single-line button and the first double-line button. Have a look.
Once you have your links looking the way you want them, take the old table(s) off your ORIGINAL page and COPY and PASTE JUST these news links onto it. Be CAUTIOUS, I don't know what your particular HTML editor will do to these buttons.
Lastly, COPY the STYLESHEET from your WORK page and PASTE it just above the </head> at the top of your ORIGINAL page.
**If your editor changed your relative links, you can do a REPLACE for the extra path that you don't want. (ie, c://file/users/g/documents/websites/rusk/)
This was probably one of the hardest sets of links I've converted to buttons. I used it as an example so you can see what you're facing if your links aren't short 'n' sweet and neat.
WHY did I do all this? Because tables don't adjust well to being viewed on small tablets or cell phones; these buttons will "float" from one line to the next depending on how wide your browser is or how much SPACE you have on your page.
|
Step 1.
Step 4.
Step 6.
|