Step 3 - Add Containers to Your Page
We're going to create some containers on your page using the
<div> tag.
header - Whatever you have at the top of your
page to identify your page to the world. It may be a graphic or it
may be some text in a large font. It may be on every page or just
your default home page.
footer - Whatever you have at the bottom of your
page. It may be a simple link to your main page or it may be a
whole paragraph with copyright information, last update and a hit
counter.
content - The main part of the page that gives
your visitor the information they're seeking.
First, decide if there are any images on your page that you don't
necessarily need on a mobile site. If there is something that takes
up a lot of room, you can hide it. We'll create a class called
"invisible" and you can add that class to anything you want to hide.
For the rest of it, you'll have to figure out just where it is on
your page and then put the container around it. The easiest way to
do this is to add a word to your <div> tag and then delete it
when you're done: <div>START </div>END.
The <div> tags you're going to use are:
<div class="header">START
<div class="footer">START
<div class="content">START
Most headers begin just under the <body> tag. If you don't use
CSS, your <body> will have other stuff inside it telling the
browser how to display the page:
<body link="#663333" text="#000000" vlink="#cc6600"
alink="#EE0000" bgcolor="#ccffff"> This one shows text and link
colors and background color.
Open the page in NotePad or in the HTML Source tab of your editor.
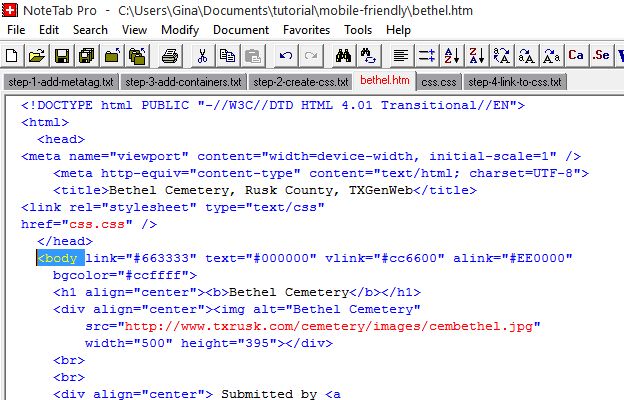
Find the <body> tag. It may be easier if you use Edit - Find
and type in <body with no ending bracket.
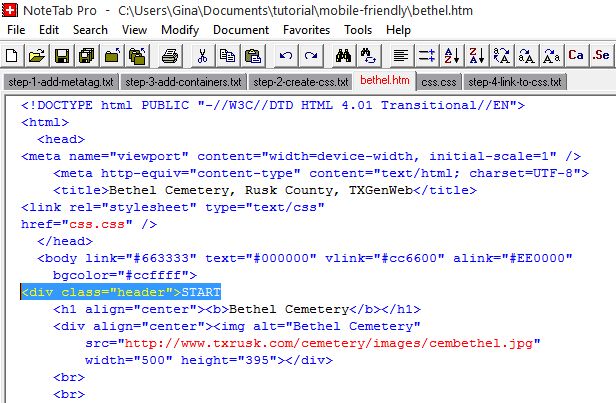
Insert a line UNDER the <body line and type, or paste ((the enter
key adds a blank line)):
<div class="header">START
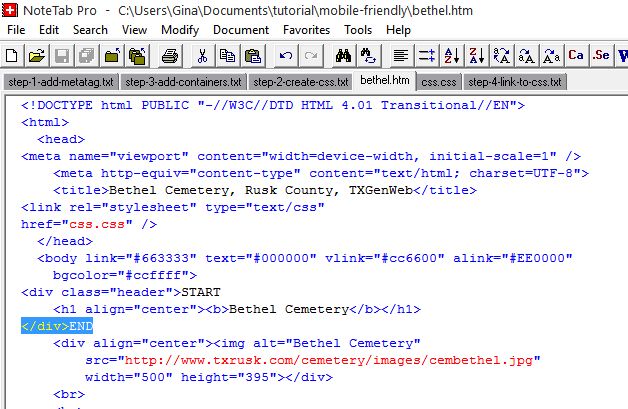
Then you need to find the end of your header, insert a line and type
</div>END.
If your header has an image, you'll need
to do one more piece of a step.
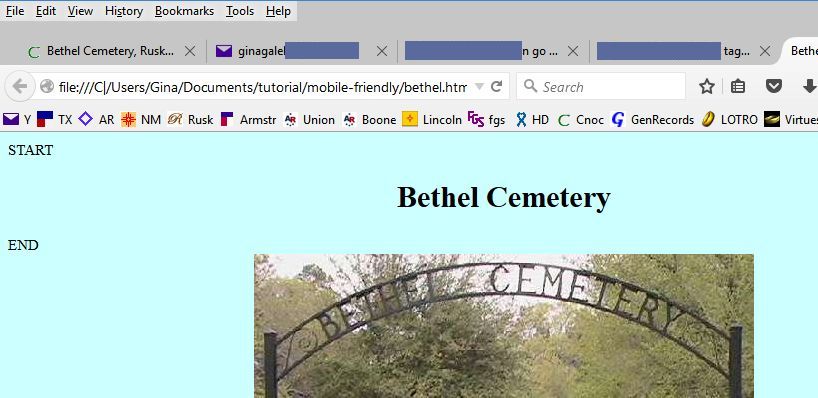
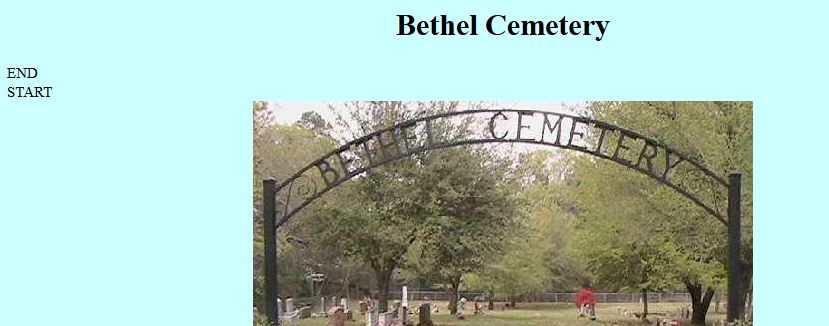
Now preview the page and see if the words START and END are where
they're supposed to be. They may not be formatted the same and
that's fine. ((Open the page in your HTML editor but DON'T
make any changes in your HTML editor. You'll have to close it again
before you go back to NotePad for the next step.))
If they're on either side of your header or above and below (or
mixed) - you've added a container to your header.
If they're in the wrong place, cut the line and paste it where it
needs to go. ((Blank lines don't hurt your page.))
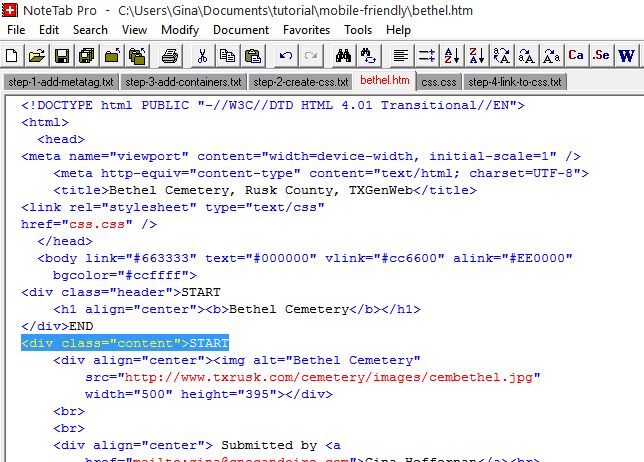
Insert a line UNDER the <div>END line you added in the last
step and type
<div class="content">START
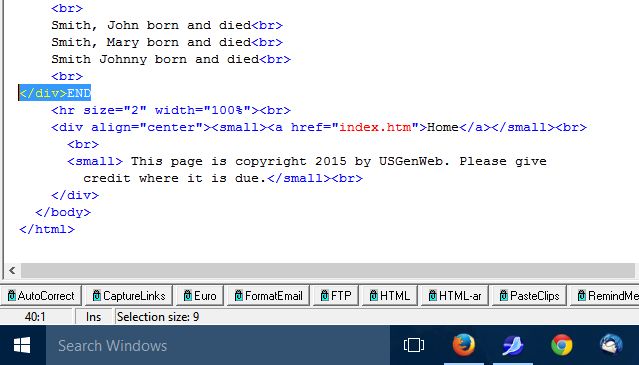
Go to the bottom of the page and find where your footer starts, if
you have one. If you don't have a footer, add a line ABOVE the
</body> tag.
Insert a line and type
</div>END
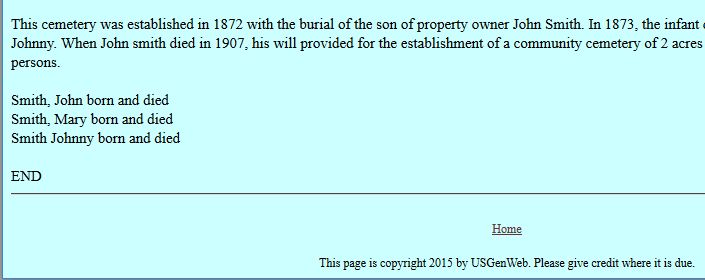
Preview the page and see if the words START and END surround the
main part of the page.
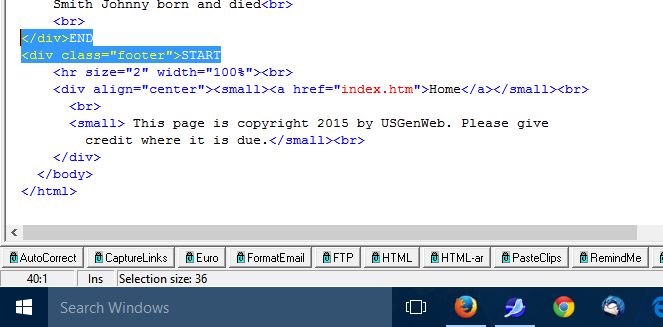
Insert a line under the previous <div>END and type
<div class="footer">START
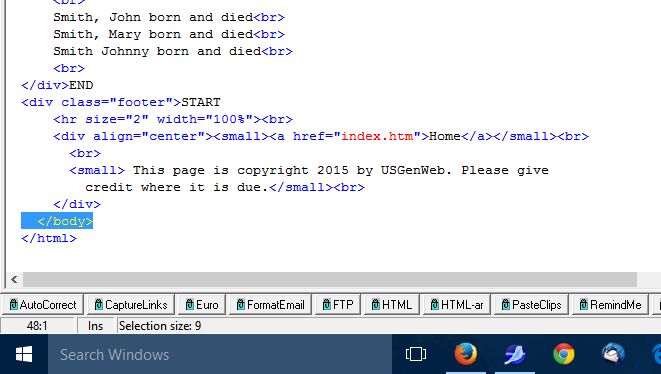
Go to the very end and find the </body> tag.
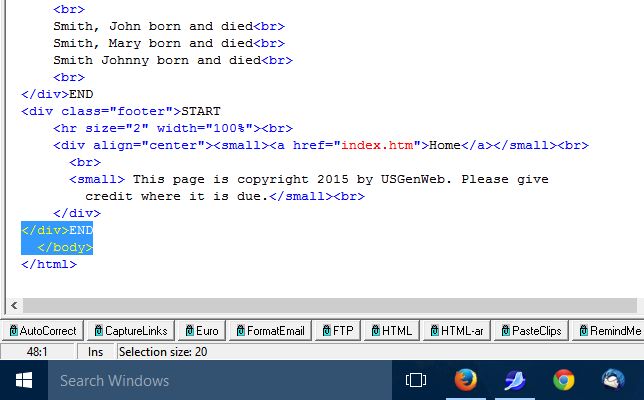
Add a line ABOVE the </body> tag and type
</div>END

Preview the page and see if everything is where it's supposed to be.
If you have a lot of blank space at the bottom of your page, your
footer tag may include it. Blank lines are indicated by
<br>, <br> , <br/>, or
<br/> (( is a space - a placeholder)) You
may want to remove those blank lines or reposition your tag below
them.
Our last task is to hide any image on the page that you don't want
to see on a mobile device. Find that image on the page and inside
the <img> tag add class="invisible". Example
<img alt="Bethel Cemetery"
src="http://www.txrusk.com/cemetery/images/cembethel.jpg"
width="500" height="395">
<img alt="Bethel Cemetery"
src="http://www.txrusk.com/cemetery/images/cembethel.jpg"
width="500" height="395" class="invisible">
Depending on your editor, the lines may have a closing slash
<img alt="Bethel Cemetery"
src="http://www.txrusk.com/cemetery/images/cembethel.jpg"
width="500" height="395"/>
<img alt="Bethel Cemetery"
src="http://www.txrusk.com/cemetery/images/cembethel.jpg"
width="500" height="395" class="invisible"/>
Save the file and close it if you're using NotePad.
Open the file in your HTML editor and preview. You should see three
groups of START and END. Leave them until you have viewed the page
online. Once you know everything is as it should be, you can erase
them in your editor.
Back to Step 2 - Create CSS file
Go to Step 4 - Link to CSS File


