Step 4 - Link to the CSS File
The next thing you need to do is to link your page to the CSS file
we created earlier.
This is another simple step that you can do in NotePad.
Relative links - links that only show a file name instead of a
complete URL.
Let's look at
http://www.cnocandoire.com/rusk/cemetery/transcriptions/something.htm
((not a real URL))
If all my cemeteries are in a folder called cemetery and I want to
link one cemetery to another my link can be a simple relative link:
<a href="bethel.htm"> ((Open the file called bethel.htm))
As long as pages are in the same folder, you can use just the
filename.
If I have additional information on the cemetery in a subfolder
called transcriptions:
<a href="transcriptions/bethel.htm"> ((Enter the
transcriptions folder and open the file called bethel.htm))
If my cemetery index is in my main folder, I have to go UP a level
using ../
<a href="../bethel.htm"> ((go up to the previous folder and
open the file called bethel.htm))
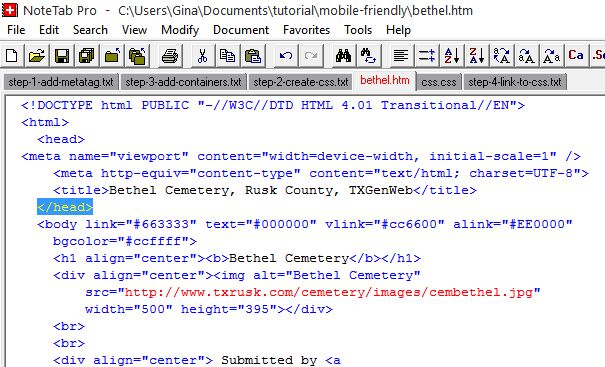
Open your page in NotePad or in the Source tab of your HTML editor.

Look for the closing tag for the </head>.

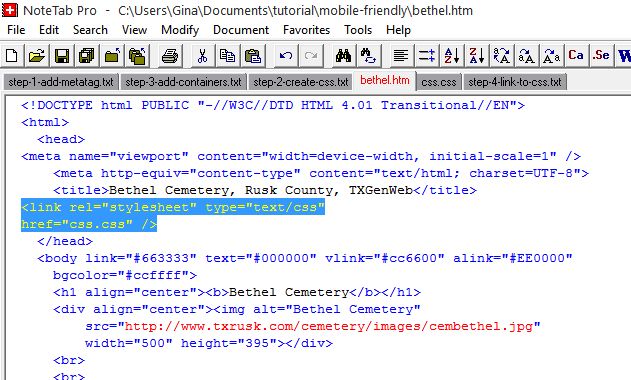
Insert a line ABOVE the close tag and type:
<link rel="stylesheet" type="text/css" href="css.css">
((This link will work for any pages in the same folder as the
css.css file. If you want to use it for pages in subfolders, you'll
need to change it accordingly.))
Remember that ALL THE CHANGES we have made to our page ONLY DISPLAY
ON SMALL MEDIA so your page should look no different in a full-sized
browser. However, if you take your browser off full-screen mode and
reduce it in size to less than 800px wide, you'll be able to see a
difference, if there is one. So far, we've changed the width of our
three sections and the size of the fonts. You may be able to see a
difference in font size.
Return to Step 3 - Add Containers
Go to Step 5 - Invisible Items

